

Marketing Lands - Guest blogging services are cropping up everywhere (including here, at Marketing Lands) as the industry begins to realize that guest blogging, as a link building tactic, is one of the few safe havens left after Penguin demolished many of the lower-cost, higher quantity tactics that SEOs came to rely upon over the course of the past several years.
There are lots of great guides available on the Web that offer nuggets of information about guest blogging, but I haven’t been able to find any that really dig deep into the most difficult part of guest blogging: Actually finding the blogs to guest post on.
Saddled with an unfortunate reputation for being a tool useful only for propagating blog comment spam, Scrapebox is actually one of the few internet marketing tools I use on a daily basis—and for only ethical, white-hat purposes.
What You’ll Need:
- Scrapebox (download it here for a one-time fee of $57. TOTALLY worth it.)
- Private proxies (Get them from Proxybonanza for a small monthly fee. I recommend going for the “Bonanza” package from the “Exclusive Proxies” section.) Note: That Proxybonanza link is an affiliate link. I’d really appreciate if you’d buy through my link!
How are We Going to Use Scrapebox to Find Guest Blogging Opportunities?
Scrapebox will execute multiple search queries simultaneously in Google and Bing, automatically harvest all the results, and allow us to manipulate, augment, and export the data.For example, let’s say you want to find good guest blogging opportunities for your website about canine epilepsy. To find other websites that rank well for the term (and similar terms) which might be good targets for a guest blog post, you’d want to examine the top 100 search results for the following search queries:
- Dog seizures
- Canine epilepsy
- Canine seizures
- Seizures in dogs
With Scrapebox, you supply the search queries, and it will perform the searches, collect the URLs of the top 100 results, and supply them to you in an Excel spreadsheet. Additionally, you can use Scrapebox to automatically find the PageRank of the domain of each search result, allowing you to filter out low-PR domains without having to manually visit them. Scrapebox also offers myriad other filtering options, such as the ability to ignore results from domains that would never accept a guest blog post, such as facebook.com, amazon.com, etc. All of the above processes can easily be completed in under 60 seconds.
Ready to take your link prospecting capabilities to a whole new level? Let’s get started.
Step 1: Load your proxies into Scrapebox
After obtaining your proxies, load them into a .txt file on your desktop in the following format:
IP:port:username:passwordHere’s an example:
IP:port:username:password
IP:port:username:password
123.456.789.012:01234:jayson:awesomepasswordIn Scrapebox, click “Load” under the “Select Engines & Proxies” area. Select the text file containing your proxies. Scrapebox should load them immediately, and look something like this:
123.478.759.032:01234:jayson:awesomepassword
123.446.899.012:05274:jayson:awesomepassword
129.486.749.012:01234:jayson:awesomepassword
176.495.989.016:01637:jayson:awesomepassword

Click “Manage” and then “Test Proxies” to test your proxies and ensure Scrapebox can successfully activate and use them.

Be sure that “Google” and “Use Proxies” are both checked.
Step 2: Choose a keyword that best represents your niche or vertical
For example, let’s say I’m trying to find guest blogging opportunities for my website about canine epilepsy. I would select “dogs” as my keyword. I could go for a more targeted approach and try “canine epilepsy” or “dog seizures” as my keyword, but I’m likely to find much less (albeit more targeted) prospects.
Step 3: Define your search queries.
Copy and paste the following search queries into a .txt document on your desktop, and replace each instance of [keyword] with your chosen keyword from Step 2.
Note: The following is my personal list of search queries that I use to identify guest blogging opportunities. Google limits queries to 32 words, which is why these are broken down into many chunks rather than one long query. Enjoy!
“submit blog post” OR “add blog post” OR “submit an article” OR “suggest a guest post” OR “send a guest post” “[keyword]”
“guest bloggers wanted” OR “contribute to our site” OR “become a contributor” OR “become * guest writer” “[keyword]”
“guest blogger” OR “blog for us” OR “write for us” OR “submit guest post” OR “submit a guest post” “[keyword]”
“become a guest blogger” OR “become a guest writer” OR “become guest writer” OR “become a contributor” “[keyword]”
“submit a guest post” OR “submit post” OR “write for us” OR “become an author” OR “guest column” OR “guest post” “[keyword]”
inurl:”submit” OR inurl:”write” OR inurl:”guest” OR inurl:”blog” OR inurl:”suggest” OR inurl:”contribute” “[keyword]”
inurl:”contributor” OR inurl:”writer” OR inurl:”become” OR inurl:”author” OR inurl:”post” “[keyword]”
site:twitter.com [keyword] “guest post” OR “guest blog” OR “guest author”
Step 4: Load Search Queries into Scrapebox.
In the “Harvester” section in Scrapebox, click “Import,” then “Import from file.” Select the file containing the search queries that you just created in Step 3. Scrapebox should then populate with the search queries, looking something like this:

Step 5: Update your blacklist.
Scrapebox has a “blacklist” which allows you to automatically filter out undesired search results. For example, I know that Facebook.com and Amazon.com will never accept a guest blog post, so I don’t want results from those domains appearing in my list.
To edit your blacklist, click “Black List” from the top navigation, then click “Edit local black list.”

After you start using Scrapebox and receiving output lists, you’ll begin to notice undesirable domains that often appear in search results. As you notice these, add them to your local blacklist so they never appear again. Here are a few good sites to add to begin with:
Amazon.comStep 6: Set Search Depth in Scrapebox
Facebook.com
Tumblr.com
Linkedin.com
Yahoo.com
Squidoo.com
Hubpages.com
Next, define how many search results Scrapebox should harvest for each query. You can do this in the “Select Engines & Proxies” area, in the text field next to “Results.” I generally set it to 200 or 300.

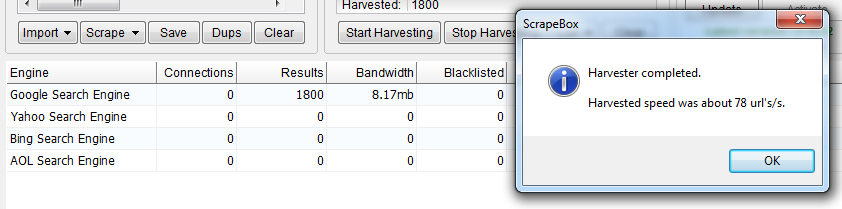
Step 7: Start Harvesting
We’re now ready to start harvesting search results for our queries. Click “Start Harvesting” in the “URL’s Harvested” section.


Step 8: Filter results by PageRank
You should now have a list of websites that Scrapebox harvested, which looks something like this:

The next step is to filter these results by PageRank, since we don’t want to waste our time reaching out to websites with a low PR. Scrapebox makes this super easy. Click “Check PageRank” then select “Get Domain PageRank.”


Next, click “Import/Export URL’s & PR.” Click “Export as Excel” and export the file to your desktop. Open the file on your desktop and re-save it if need be (sometimes the file is corrupt, but by re-saving it and deleting the older version, you can easily solve this).
Column A should contain a list of all the harvested URLs. Column B will contain the PageRank of each domain. Add column headers to column A (URL) and column B (PR).
Next, sort column B by PR, in order of largest to smallest. To do this, highlight column B by clicking on the column header, then click “Sort & Filter” in the “Home” tab in Excel. Then, click “Sort A to Z.”

You’ll see a popup box asking if you’d like to expand the selection. Do so, and click “sort.”

Remove all the rows with a PR of 2 or lower. We only want to target PR 3 and above.
Step 9: Manually Filter & Qualify the Remaining Websites.
You should now have a list of hundreds or thousands of potential candidates for guest blog post outreach. Add two more columns to your spreadsheet:
- Follow up?
- Contact information
While reviewing each website, ask yourself the following questions to determine whether it’s worthy of outreach for a guest blog post:
- Is the website designed well?
- Does it have a social following? Are they active in social media? Do they have social media icons on their website? Do they have a Facebook fan count on their website?
- Do the other posts on the website look well-written and informative, or is this website full of spam or scraped content?
You’ll also notice lots of results from Twitter (if you used my queries supplied above). Visit each tweet and try to figure out whether the author has a blog and accepts guest posts. If so, follow that author on Twitter, and then reach out politely to ask them about doing guest blogging for their website.
Step 10: Finalize Your List for Follow-Up.
After you’ve finished manually reviewing each website and deciding whether it’s worthy of asking for a guest blogging opportunity, save your Excel file and begin your outreach to the authors & webmasters.
Scrapebox has several very useful “Addons” which you can access from the “Addons” menu. For link prospecting, I recommend installing the “WhoIs Scraper.” This handy tool will automatically crawl your list of links and perform a “WhoIs” lookup to tell you the following information about each domain:
- Registration Date
- Registration Expiration Date
- Registered owner’s name
- Registered owner’s email address

Establish and grow your relationships with each one, and you’ll be scoring guest blog posts in record time! So, are you going to try it? Leave a comment and tell us whether or not this method has saved you tons of time!
0 Response to "10 Easy Step To Find Guest Blogging Opportunities"
Post a Comment